
The Making Of A Photograph
Tuesday Apr 16, 2013 Filed in: Photography
Recently I visited the Living Desert Museum in Palm Desert. I went with a couple of other photographers from Trilogy; Bill and Tim. This was my first trip to the Living Desert; they have a nice collection of African and Colorado Desert wildlife in addition to a nice botanical garden. While I was having fun taking pictures, my expectations were low - it was a very windy day, so flower pictures were not going to happen, and the problem with any zoo is trying to compose an animal shot without getting undesirable elements of the enclosure in the picture.
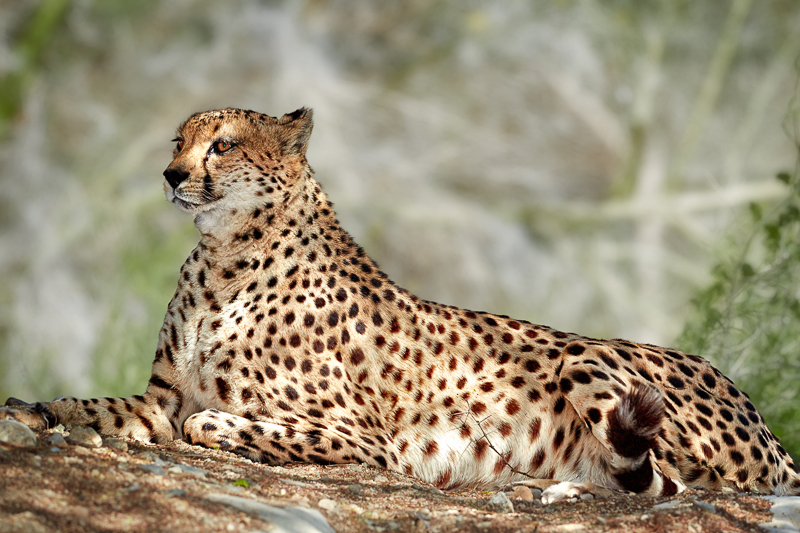
So, I was having fun but not seeing anything great. And then we came upon the cheetah enclosure. At first not much was happening. But after watching for a bit I noticed one of the cheetahs had moved to a mound of dirt in the center of the enclosure and was giving an interesting pose. So I set up the tripod and shot a picture. The cheetah was happy and stayed put, so I started working the shot, both the composition and the exposure. The result is the photograph at the top of this page.
Bill and Tim were watching me as I worked the shot, and we talked about the use of fill flash to improve the exposure and other aspects of the shot. So, I thought it might be useful to others to illustrate the steps I took to get this shot. Here goes….
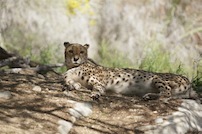 This is my first attempt at the photo (as you’ll see it often takes some work before I get the composition right. Like most of you, I make a lot of mistakes and it doesn’t come naturally). I had my 70-200 lens on the camera with a 1.4x teleconverter (280 mm focal length). My initial thought was to keep some of the environment in the shot. However, the cheetahs tail was too close to the right-hand edge of the picture, so I adjusted the framing and tried again.
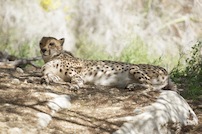 Better, but the rock in the picture was way too bright to my liking. So, I decided to go with my 300 mm lens and the 1.4x teleconverter (420 mm focal length). The resulting shot was a little tight, but I was able to eliminate most of the white rock.
But, I still had a couple of problems with the shot: I was losing too much of the cheetah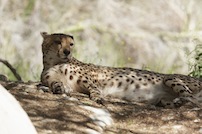 on the right hand side of the picture, and the piece of rock in the lower left-hand corner was too distracting. Also, it was about this point in time I knew that I had to do something about the harsh shadows in the picture.
My next step was to move the tripod. I actually moved it about three times (a total of about 3 feet to the right) before I completely eliminated the rock and avoided some other distractions further left of the cheetah. Fortunately I had brought my flash with me, so I got out the flash and the Better Beamer to efficiently project the flash to the cheetah. I knew from experience that I didn’t want full strength fill flash, so I dialed in a flash exposure compensation of -2/3. However, the resulting picture looked too “flashed”, so I dialed it down some more to a setting of -1 1/3; I liked the result much better.
I then optimized the final version of the picture using my usual workflow in Photoshop. My workflow involves the usual global adjustments for exposure (white point, black point and brightness), contrast, and color balance. I also apply creative sharpening and local contrast adjustments using dodge and burn techniques. I also used a mask to selectively blur and darken the background so that it wouldn’t detract from the main subject, the cheetah.
So, I was having fun but not seeing anything great. And then we came upon the cheetah enclosure. At first not much was happening. But after watching for a bit I noticed one of the cheetahs had moved to a mound of dirt in the center of the enclosure and was giving an interesting pose. So I set up the tripod and shot a picture. The cheetah was happy and stayed put, so I started working the shot, both the composition and the exposure. The result is the photograph at the top of this page.
Bill and Tim were watching me as I worked the shot, and we talked about the use of fill flash to improve the exposure and other aspects of the shot. So, I thought it might be useful to others to illustrate the steps I took to get this shot. Here goes….
But, I still had a couple of problems with the shot: I was losing too much of the cheetah
My next step was to move the tripod. I actually moved it about three times (a total of about 3 feet to the right) before I completely eliminated the rock and avoided some other distractions further left of the cheetah.
I then optimized the final version of the picture using my usual workflow in Photoshop. My workflow involves the usual global adjustments for exposure (white point, black point and brightness), contrast, and color balance. I also apply creative sharpening and local contrast adjustments using dodge and burn techniques. I also used a mask to selectively blur and darken the background so that it wouldn’t detract from the main subject, the cheetah.